

NetMine Installation
- Download ProteMac NetMine from www.ProteMac.com/NetMine.
- Run the ProteMac-NetMine.dmg file from the desktop, or download location.
- In The ProteMac NetMine window, double click the install.pkg file.
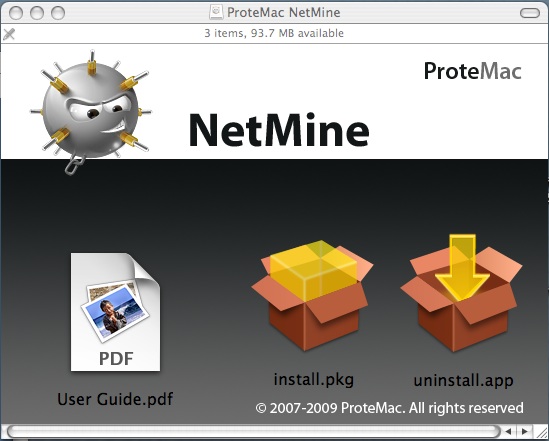
- Follow the prompts to install the program.
- After installation you may delete the ProteMac-Netmine.dmg file from your desktop.
NetMine is installed and ready to use. The NetMine program is controlled through the Preferences Panel on your Mac.
Immediately after installation, NetMine is running and monitoring all incoming and outgoing network traffic on your Mac.
Registration
- In the main window (go to Applications and double-click ProteMac NetMine icon) click the registration buton to enter your registration name and key. For that purpose copy regname and regcode from email without blanks before and after reginfo.
- Paste copied info to open window and press Register button. To end this operation, hit OK button. Once you have regitered the software, the Registration button doesn’t appear anymore.
To Use ProteMac NetMine
- Open the System Preferences panel on your Mac by selecting the Apple icon in the top left-hand corner of your screen and selecting “System Preferences…”
- In the last section of Preferences Icons, under “Other”, you will find the NetMine Icon. Click the icon to open the NetMine control panel.
- The NetMine window consists of two main sections “Rules for Applications” and “Default Behaviour Settings.”
- To make changes in either section you will first have to unlock the security settings by clicking the padlock icon in the bottom left corner of the ProteMac NetMine window and enter your Mac password in the “Authenticate” window.
- When you have finished setting preferences for NetMine, click the padlock icon to password protect these preferences.
To Set Rules for Applications
- The “Rules for Applications” tab shows all of the programs on your Mac that communicate with a network or with the Internet. After each program name is an “Allow” or “Deny” icon.
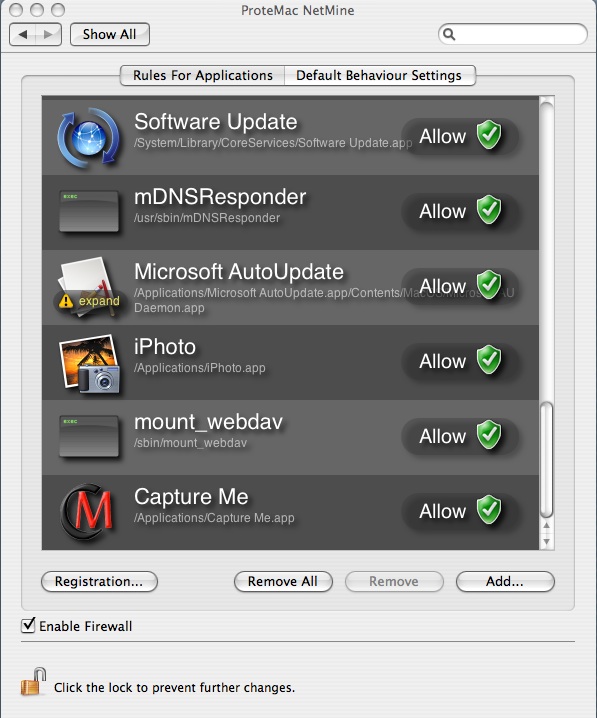
- To add new programs to this list click the “Add” button in the bottom right hand corner of this window.
- In the “Open” window, select the program that you’d like to add to ProteMac NetMine rules. Click “Open.”
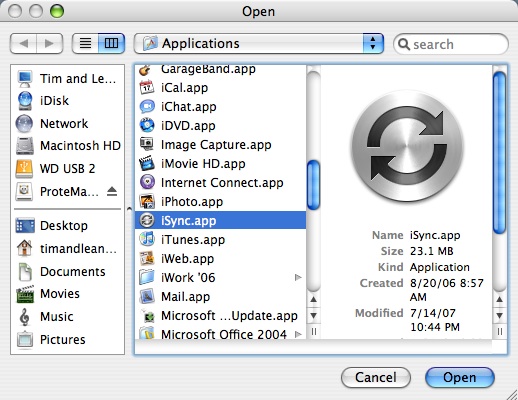
- The selected program is added to the list with a “Deny” setting.
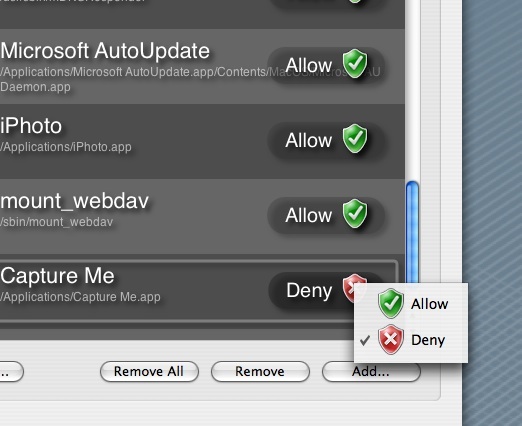
- To change the Allow/Deny setting of any program in your list, click on the Allow/Deny icon, and select the proper setting from the drop down menu.
- When a program that is not listed in the “Rules for Applications” window attempts to communicate with the network or the Internet a permissions window will appear and ask for user input to Allow or Deny the connection.
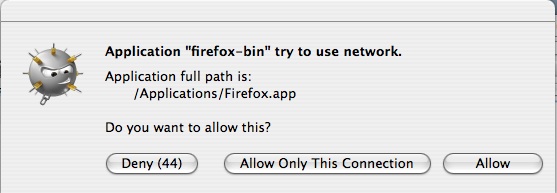
NOTE: The “Deny” or “Allow” button counts down 60 seconds. The preferences for this behaviour are explained in the following section: “Default Behaviour (If User Not Answer)”. - To remove any program from the “Rules” Window, select the application name from the list then click the “Remove” button.
- To remove every application from the “Rules” Window, select the “Remove All” button.
- A check in the “Enable Firewall” check box activates NetMine. If this box is not checked, NetMine is not monitoring or controlling the activities of your programs.
Default Behaviour Settings
- The “Default Behaviour Settings” tab allows you to set the default behaviours of NetMine, asking permissions and the default answer (allow or deny.)
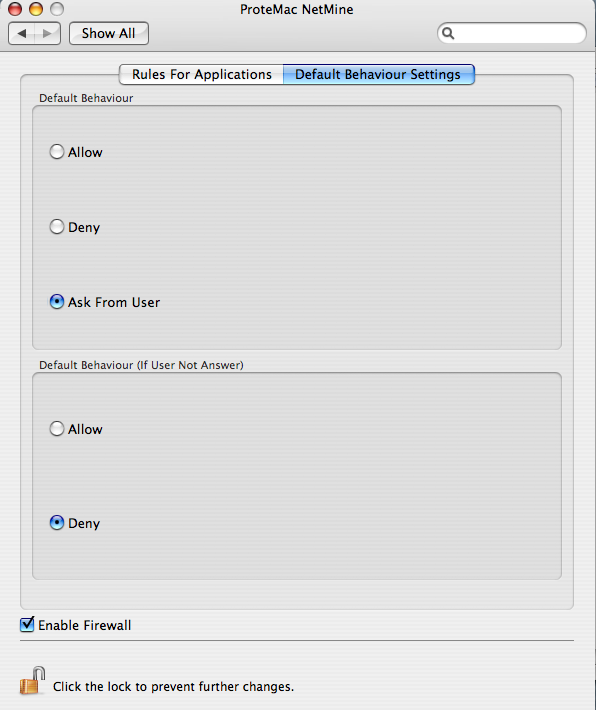
- The “Default Behaviour” option at the top of this screen sets how NetMine will react when a new application attempts to access the Internet or network, or when the network or Internet try to access an application.
- Allow – Internet or Network communication is automatically allowed.
- Deny – Internet or Network communication is automatically denied.
- Ask From User – a pop up window asks for user input to select Allow or Deny.
- The “Default Behaviour (If User Not Answer)” section determines how NetMine will react if there is no input from the user.
- Allow – after 60 seconds if there is no input from the user, NetMine will automatically allow communication.
- Deny – communication is denied with no user input after 60 seconds.
- When you have finished setting preferences for NetMine, click the padlock icon to password protect these preferences.
NetMine is configured and ready to protect your Mac from unwanted visitors. NetMine is a powerful line of defense, offering two-way protection between your Mac and outside computer world.